Welcome to the User Manual for Intego VirusBarrier Scanner!
This free antivirus and malware removal tool for your Mac provides the first line of defense against these threats. Based on the original Mac anti-malware scanning engine found in VirusBarrier that has protected hundreds of thousands of Apple users, Intego's VirusBarrier Scanner allows you to find and eradicate viruses on your Mac to stay safe in an online world.
Use the Table of Contents below to access the different sections of the manual.
Table of Contents
- Getting Started with Intego VirusBarrier Scanner
- Running Malware Scans
- Scheduling Daily Scans
- Quarantine
- Updating Malware Definitions
- Scan Preferences
- Trusted Files
- Uninstall
- Technical Support
- Learn More about Internet Security X9
Getting Started with Intego VirusBarrier Scanner
Intego VirusBarrier Scanner allows you to easily scan your entire Mac, or specific locations such as your personal documents folder. Protecting you against both Mac and Windows malware helps you stay safe and ensures that you don't pass malware along to your friends or family.
Features:
- Simple to use, designed specifically for the Mac App Store
- Detects Mac and Windows malware
- Automatically update virus definitions prior to scanning
- Can be configured to run automatically on a schedule
- Scan your entire computer, critical locations, or specific files on your Mac
- Quarantine, repair or delete dangerous files
Constraints:
- Due to limitations imposed by the Mac App Store, this app cannot perform real-time scanning where the malware scanner can automatically scan new or recently modified files. It is only able to scan your computer on a periodic basis, or when requested to scan by the user
- Scanning is limited to locations on your computer where you have granted access for VirusBarrier Scanner. We make it as easy as possible in the user interface for you to do this!
Running Malware Scans
You can run a manual scan with VirusBarrier Scanner whenever you want. You should do this immediately after installation to ensure that you don't have any infected files, and you should scan your Mac again each time you update the program's malware definitions.
Manual Scans
To scan all files for which you have permissions, click the Start Scan button in the Manual Scan section of VirusBarrier Scanner's main window. A new window will appear which will allow you to select a specific section of your computer to scan. As in Finder, you can navigate inside folders and volumes by double-clicking them. You can also change the view to see your files as a simple list or in a file browser by clicking the view buttons in the window's upper-left corner. For example, you can choose to scan the Macintosh HD or just your personal Documents folder. Click a file, folder, or volume to select it for a scan. This can scan all files in your home folder, as well as other files that you are allowed to read. (For standard administrator accounts, this includes all applications in your Applications folder, as well as most system files in the Library and System folders.)
Drag and Drop Scanning
You can scan any volume, folder or file by dragging it onto the main VirusBarrier Scanner window or icon in the Dock. VirusBarrier Scanner will scan that item or items, and will alert you if anything you scanned contains malware. It's a good idea to use this feature if you have downloaded files and are not sure that they are safe, or if you receive suspicious file via e-mail.
Running Scans from the File Menu
You can launch scans from the VirusBarrier Scanner File menu. Choose Scan (or press Command-O) to open the browser window and select items to scan. You can also choose Start a Daily Scan Now (or press Command-Return). These scans run the same way as when you launch them manually, as described above.
Once you have chosen the scan area and selected the Scan option in the window, VirusBarrier Scanner will display the number of files scanned and a progress bar for the percentage of the scan completed.
You can stop a scan at any time by clicking the Stop Scan button.
When Malware is Found
If VirusBarrier Scanner finds any malware or infected files on your Mac, when the scan is finished it displays an alert showing the name of the infected file(s).
Click on a file to select it. If you have the appropriate permissions, the Restore & Repair button will be available. Select this option to have VirusBarrier Scanner eliminate the malware and restore the file to its original location. You can see the file path at the bottom of the alert dialog when a file is selected. Delete removes the file from your Mac completely. You can also click Done to leave the file in Quarantine.
(Note: Press the Alt/Option key on your keyboard to Restore the file without Repair. You should only do this if you think the file was mistakenly flagged as containing malware. In this case, you should note where the file is located and check to make sure it is safe)
Scheduling Daily Scans
VirusBarrier Scanner can be automatically configured to run scheduled scans at pre-arranged times. To configure these scans, select Options from the Daily Scan section of the VirusBarrier Scanner main window.
Daily Scanning Mode
- Maximum Protection: Scans all files, with the exception of those files which belong to other users on your Mac. (VirusBarrier Scanner does not have permission to scan these files due to App Store restrictions)
- Essential Protection: Scans only those locations where malware is commonly installed. The files and folders scanned may change as new malware appears, and the locations scanned may be different with newer versions of VirusBarrier Scanner's virus definitions.
- Disabled: This option turns off all daily scan operations
Maximum Protection: VirusBarrier Scanner will automatically detect volumes connected to your Mac that are available for scanning and allow you to choose which volumes you want included in your daily scans.
Essential Protection: Choose from locations where malware is commonly found. Due to Mac App Store restrictions, access must be granted to VirusBarrier Scanner for each location to be scanned.
Click Allow... for each area you wish to scan, then click the Allow button again in the file selection window.
Locations to Scan: Select which volumes VirusBarrier Scanner can access for scans
Quarantine
When VirusBarrier Scanner detects malware it automatically places the files in its Quarantine zone. When files are quarantined, they can't be opened or read, ensuring that they cannot infect your Mac. You can then check these files and decide what to do. The View... Quarantine button at the bottom of VirusBarrier Scanner's Overview screen shows you which files have been quarantined.
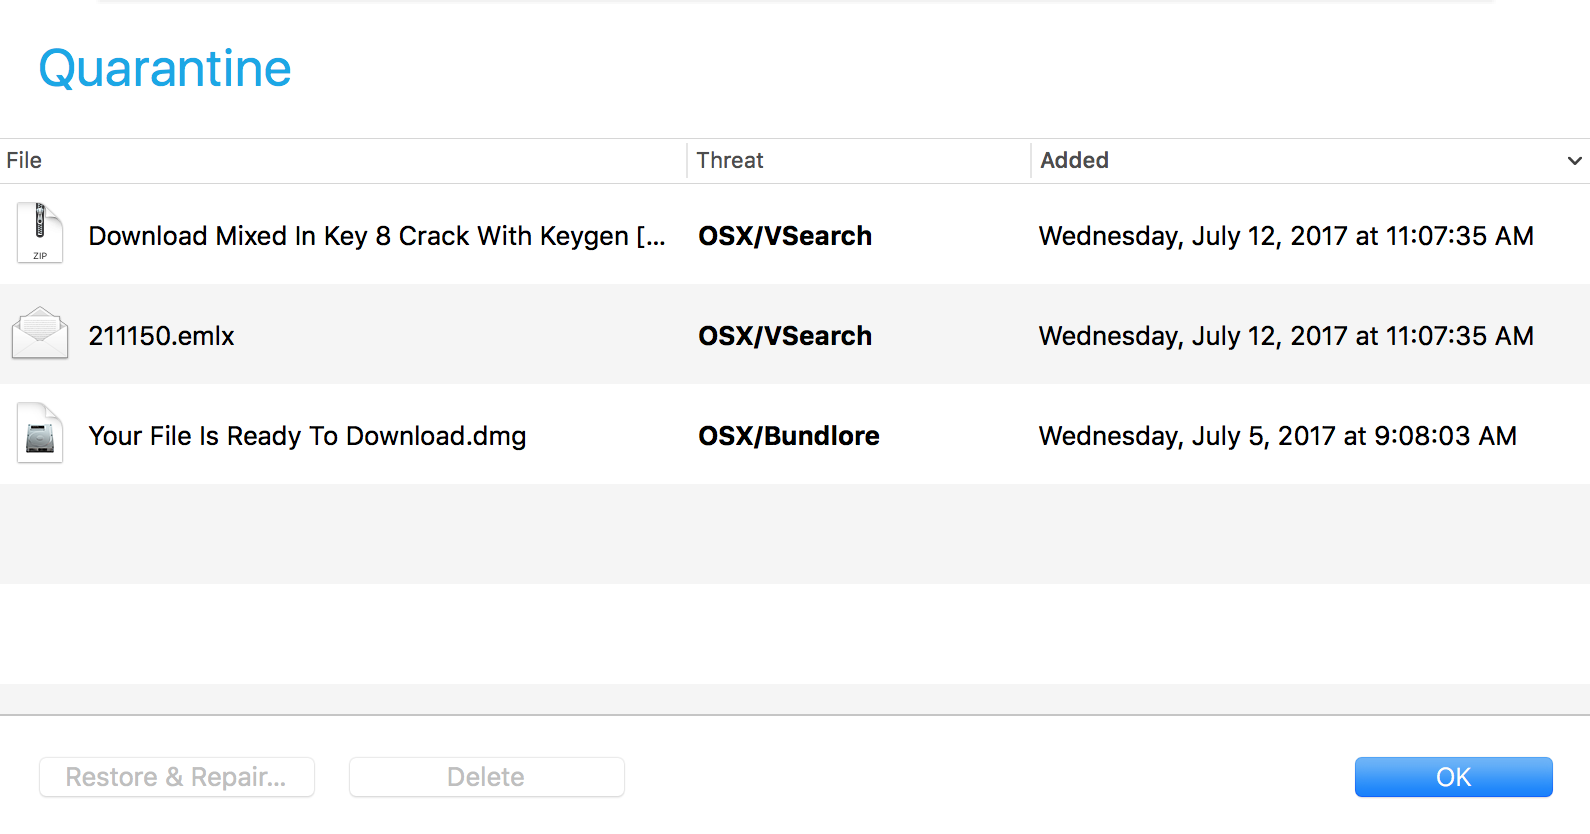
You'll see a new window which shows what files are in the Quarantine zone, as well as a group of buttons allowing you to act on those files. To act on any of the files, select them and then click one of the three buttons at the bottom of the window.
You can do the following:
- Restore & Repair... tells VirusBarrier Scanner to remove the malware from the file and return it to its original location.
- Delete removes the file from your Mac immediately.
- OK closes the window with no action taken.
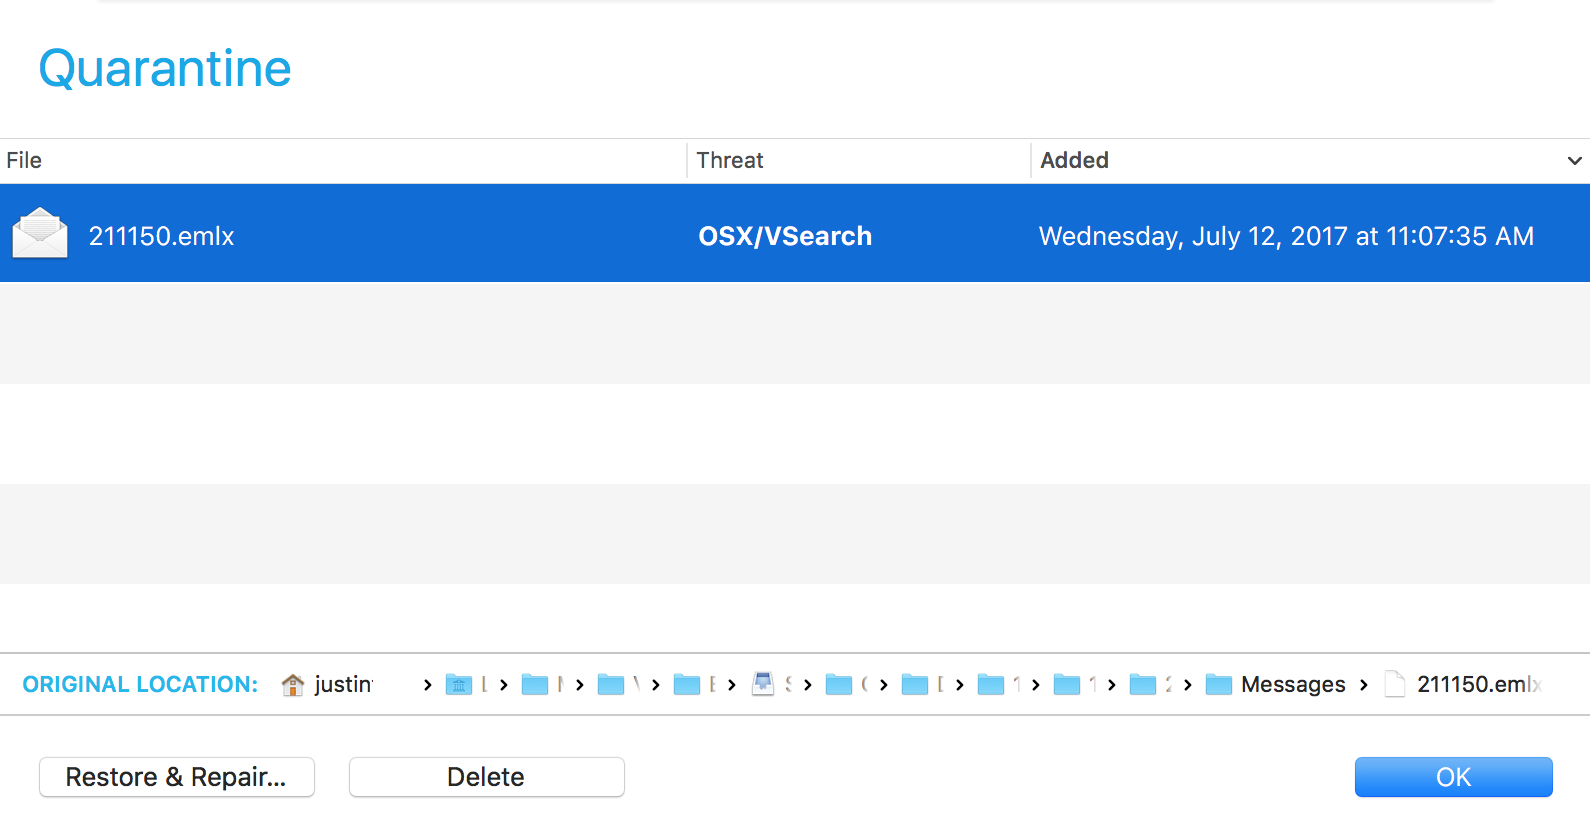
- (Optional) Restore only. Press the Alt/Option key on your keyboard and the Restore & Repair button can now be used to Restore the file without Repair. You should only do this if you think the file was mistakenly flagged as containing malware. In this case, you should note where the file is located on your Mac and check to make sure it is safe. This tells VirusBarrier Scanner that you think this file is not infected, and adds the file to the Trusted Files list. This may be used for false positives. However, be very careful when you click this button: only do so if you are sure the file is safe. If not, it may infect your entire Mac!
You can also see the file location path for the quarantined file in the bottom left corner of the window.
Updating Malware Definitions
VirusBarrier Scanner checks for malware definition updates before every scan, or every six hours. When you view the VirusBarrier Scanner > About VirusBarrier Scanner window from the menu bar, you will see the date of the currently installed malware definitions. Visiting this window will also trigger VirusBarrier Scanner to manually check for new definition updates.
VirusBarrier Scanner has several options to let you control how its various functions run. You set these options in the Preferences window, which can be reached either by choosing VirusBarrier Scanner > Preferences from the menu bar or pressing Command-Comma on your keyboard.
- Only scan new and changed files: This option allows VirusBarrier Scanner to work smarter and faster by only scanning those files which are new or have been modified since the last scan. (Note: All files are scanned the first time)
- Scan archives: Archives contain one or more files, usually in a compressed format, so that they can be transferred quickly and easily. VirusBarrier Scanner will look inside several popular types of archives, scanning not only the archive file itself, but also the files that it contains.
- Scan with low priority: This tells VirusBarrier Scanner to use the least amount of system resources possible when running a scan. (Scanning with low priority will increase the time required to perform the scan, but other applications will be more responsive during the scan)
- Play a sound when scan is finished: This option, when checked, will alert you with a sound when a scan is complete.
VirusBarrier Scanner offers the option to add files, folders or volumes to a list of Trusted Files. It will assume that these files are all safe and will not scan them. You should only use this feature for files that have already been scanned by VirusBarrier Scanner.
There are two ways to add files to the Trusted Files list.
- Click the small '+' button at the bottom-left corner of the screen, navigate to the item you'd like to add to the Trusted Files list, then click the Trust button, or:
- Drag and drop the item from Finder into the window
Adding a folder or volume tells VirusBarrier Scanner to trust all files contained in the selected item, including any subfolders it contains.
If you have upgraded to VirusBarrier X9, it is recommended that you uninstall the VirusBarrier Scanner App. To do so, first 'Quit' the application if it is open.
Now, from Finder, move the App from the Applications folder to the Trash. You can also right click (or Control+Click) on the App and choose 'Move to Trash'.
Once password authentication is confirmed, open and empty the Trash.
A Contact Support option is available from the About VirusBarrier Scanner window. If you still have questions about using your VirusBarrier Scanner app and cannot find the answer in this User Manual, please check our Knowledge Base for answers to the most common questions:
You can also contact our Support Team directly for assistance by completing a support ticket online here:
Learn More About Internet Security X9
Only Mac Internet Security X9 provides comprehensive protection from malware and network threats. This bundle contains the award-winning VirusBarrier X9 and NetBarrier X9 software which includes full anti-malware and anti-virus protection together with a firewall, network protection, anti-spyware features and more. Find out more about these and other Intego products at www.intego.com.
Comments