
Table of Contents
- What NetBarrier Will Do for You
- Running NetBarrier for the First Time
- What am I Looking At?
- Blocking an Application
- NetBarrier Monitor
- Firewall
- What are these Pop-ups?
- Advanced Configuration
What NetBarrier Will Do for You
In addition to helping you stay safe while you move around between various wireless hotspots, NetBarrier also provides you with some handy information about how your Mac is using the network.
- Whenever you join a network, for example when you walk into a coffee shop and join the wireless hotspot, NetBarrier will see this and ask you what kind of network it is. Your protection will automatically be configured so that it is appropriate for a particular environment.
- Does that video upload to Facebook seem really slow because DropBox is synching folders for work Did you know that DropBox was synching folders for work? You have lots of applications using the network and only one pipe through which all of their data needs to move. The application list shows a useful overview of what applications are active on the network helping you understand in real-time which applications are active and how busy they are relative to each other.
- The Application Monitor is a handy little window that you can leave running on your desktop showing a condensed view of the application list.
- NetBarrier provides a basic firewall that allows you to block or allow the basic “channels” into and from your Mac. For instance, you can block connections to the local network.
- NetBarrier makes it easy for you to go beyond this basic configuration and control individually what devices are allowed to connect to your Mac or what Internet domains your mac is allowed to communicate with.
- A powerful anti-spyware feature provides you fine grained control over what applications are allowed to communicate on the network and how they are allowed to do it. Real-time popups allow you to block applications from accessing specific domains or from using the network altogether.
Some of this may seem complicated. Rest assured there is no complicated setup required. These features operate almost entirely automatically.
Running NetBarrier for the First Time
When you first run NetBarrier, you will notice that it asks you what type of network you are connected to. This allows NetBarrier to automatically configure itself so that it provides the right level of protection.
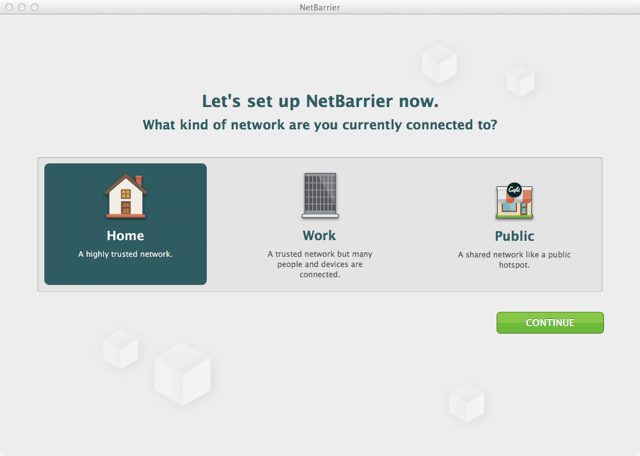
The three choices are “Home”, “Work” and “Public”. When you choose one of these options, the protection level configured for your Mac will change accordingly. As you would probably expect, “Home” is going to allow more operations than “Public”. For example, there’s a good chance that at home, you will want to allow other computers to connect to your Mac while at the coffee shop there’s a good likelihood that you do not want this to happen.
That’s it. You’re done setting up!
The next time that you change the network you are connected to, for example you drive to the local coffee shop and join the public hotspot, NetBarrier will pop up and ask you what kind of network this is as described above. This will only happen once for every network. Once you select a network type for a network, you won’t be asked again. When NetBarrier sees that you have re-connected to a network, it will use the profile selected when you were last connected to the network.
Advanced users may delve deeper into what each of these configuration options does and make more detailed changes on the Configuration view. Click the “Configuration” tab at the top of the application to see this view.

To make more complex changes to the configuration, click the Edit button in the lower left. Additional controls will be added to the configuration list allowing you the ability to make highly granular changes to the configuration. Any changes you make apply only to the configuration selected, for example “Work”. This allows you tailor each protection level to your specific needs.
What Am I Looking At?
NetBarrier provides an extremely powerful set of features in a simple user interface.
When you first connect to a network you’ll choose what type of network it is. When you re-connect to a network it will automatically be treated as the same type of network you specified the last time you connected to the network.
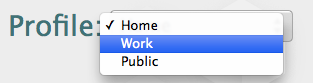
You can change the network type at any time by clicking in the network type drop down menu in the upper right and selecting a different profile.
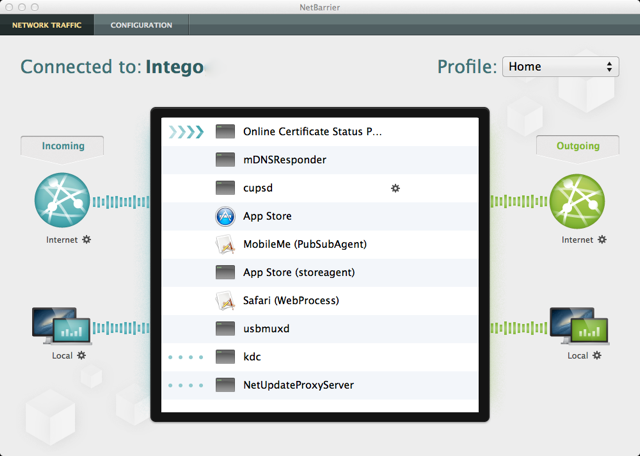
Probably the most notable feature on the main window is the application list.
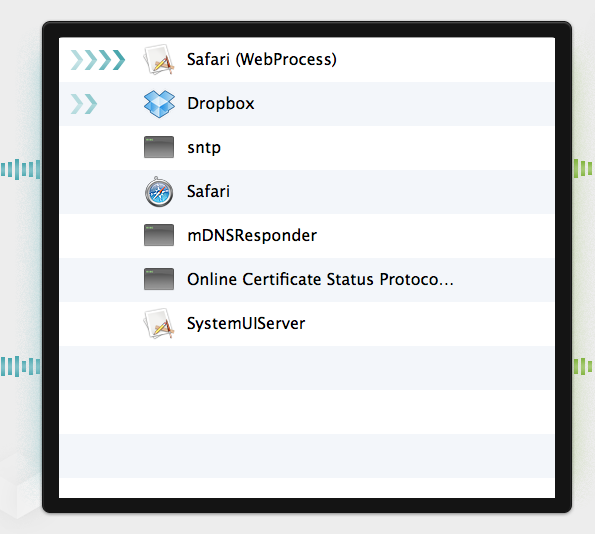
The application list shows the applications on your Mac that are actively using the network. This helps you understand, at a glance, which applications are using your network bandwidth. This can be incredibly useful if you are using a mobile hotspot like your cellular phone and have limited bandwidth.
The list shows the applications that are currently using (receiving or sending data) or have recently used the network. The list is sorted based on which application was most recently active. When an application stops either generating network activity it will slowly fall down the list and eventually after it has been inactive for a few minutes fall of the list entirely. There are many processes using the network that you probably have never heard of, such as “mDNSResponder.” That’s okay, many of these are simply system processes that might have obscure names. You should be able to lookup any of these application on the Internet and quickly find out what they do.
When an application is using the network, one or more arrows will be shown to the left or right. Blue arrows on the left indicate the application receiving data. Green arrows on the right indicate data leaving the application. The number of arrows drawn indicates how busy the application is relative to other applications using the network.
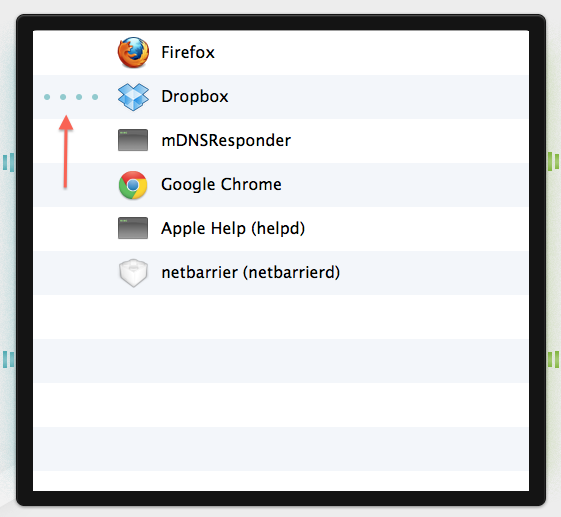
The other type of application you probably have on your Mac using the network is an application that is listening for connection requests from other computers on the network. These are represented with four blue dots shown to the left of the application.
Blocking an Application
If you really don’t trust an application, NetBarrier can easily help you out there. When the mouse moves over a row in the list, a gear icon  appears. Click this icon and you will see a window allowing you to control the application as shown below:

Click the pull down list on the right to change the options for the application. You can have NetBarrier ask you if the application should be allowed when it uses the network, block the application altogether or allow the application in all cases if you trust it.
For even finer control, the list shows “who” the application has been talking to and you may choose to block the application from communicating with specific Internet domains instead of blocking its ability to communicate altogether.
NetBarrier Monitor

The Net Barrier Monitor is separate from the rest of the application and is designed to always be available on your desktop. Optionally, you can elect to have it always be shown on top of other windows.
The Monitor window shows the same information that is shown in the Application List just described. To turn off the monitor click the X in the upper left corner.
If you wish to turn the Monitor back on at any time, run NetBarrier. Select “Window” from the main menu and choose “Application Monitor.”
Firewall
The firewall controls allow you to control the network “channels” between your Mac and the outside world. There are four basic channels; incoming Internet, incoming local, outgoing Internet and outgoing Local.


The default values configured when when you tell NetBarrier what kind of network you have connected to should be sufficient for most users. However, if you choose to override these values, this is easy to do. Click the gear icon next to the channel name:  and select a new value from the pull down menu on the right.
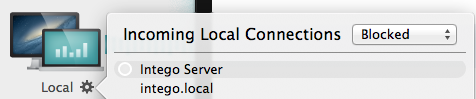
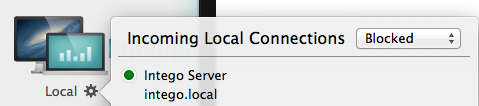
Depending on what channel you select, you will also see other devices that have “been seen” on the network or to which your Mac has communicated. You can choose to block or allow individual devices using the pull down menu.
Returning once again to the coffee shop example, in this case all incoming local connection attempts to your Mac will be blocked. But let’s say you’re with your friend and you want to share a file with them from your computer. It’s simple, click on the grayed out circle in the list (it will turn to green) and only that computer will be allowed through the firewall. Of course you may also allow other computers through the firewall as well.
What Are These Pop-ups?
Whether the NetBarrier application is running or not, it is constantly watching for applications attempting to use the network. When an application first attempts to use the network, you will see a popup probably in the upper right corner that tells you the application is trying to do something.

You may see a name here that isn’t very helpful. NetBarrier does not show a popup by default for system processes so this should help with some of the most confusing application names, however, some names may still be a little confusing. The best way to figure out what an application is and whether it may be harmful is to simply run a network search on the application name.
Using the popup, you can elect to allow the application or block it. The popup asks if you want to allow the application to use the network. Select “Yes” or “No” to configure the application.
If you’re not sure what to do, you can click “I’m not sure.” NetBarrier will do its best to collect some additional information about the application such as its publisher. If you are still unsure, you can choose to block the application for 1 minute. This will temporarily block the application so you can “see what happens.” If you really don’t trust the application and nothing seems to go wrong while the application is temporarily blocked you can choose to block it when you are asked again if you want to allow the application to run after 1 minute.
Advanced Configuration
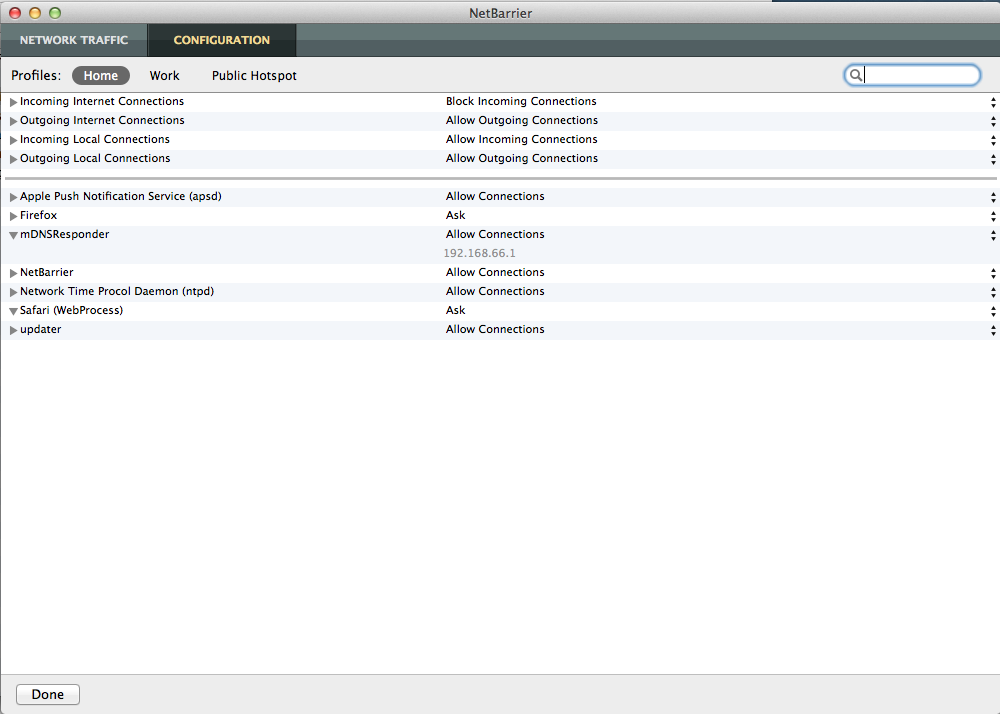
Select the “Configuration” tab from the main tab bar at the top of the window to make advanced configuration. To edit rules, click on the “Edit” button in the lower left corner of the Configuration window.
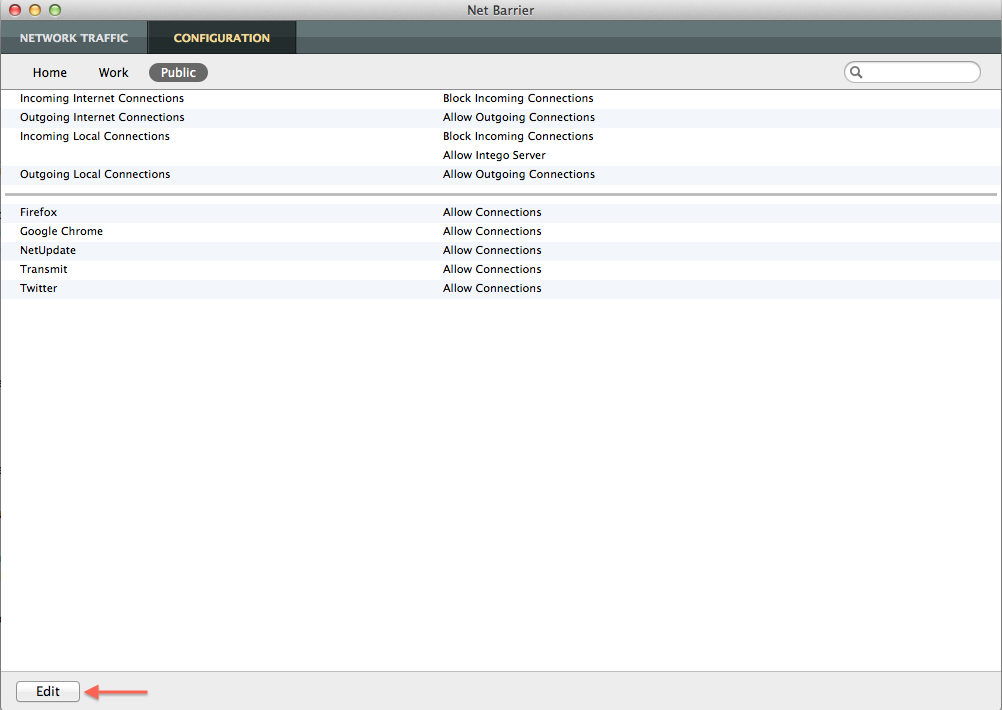
Select the profile being edited along the top. You may edit any of the three default profiles; Home, Work or Public. When you are done editing click the “Done” button in the lower left (“Edit” will change to “Done” when you click the “Edit” button.)
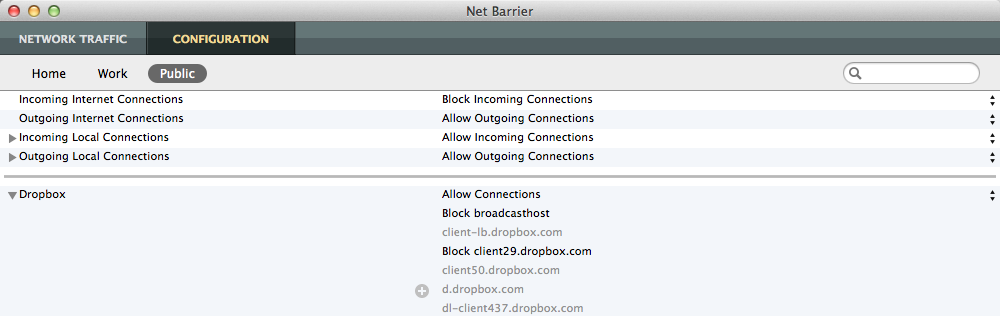
This window provides access to the raw rules that are used by NetBarrier. The rules are shown in a list. The top of the list contains the rules for the basic firewall channels. Below these rules separated by a gray line are the application rules.
Click on a rule description in the middle of the list to modify it’s basic setting. For channels this allows you to block or allow the entire channel. For applications this allows you to configure the application as “Ask”, “Block” or “Allow”. When an application is configured as “Ask”, the first time the application attempts to use the network after you log-in, you will be asked whether you wish to allow that application to run or not.
Any entry that can be expanded will have a gray triangle next to it. Move the mouse over a row and click the icon to the left of the row to modify the device state. Blocked items are shown in black. Allowed items are shown in light grey.
Expanding “Incoming Local Connections” or “Outgoing Local Connections” allows you to modify rules for specific devices.
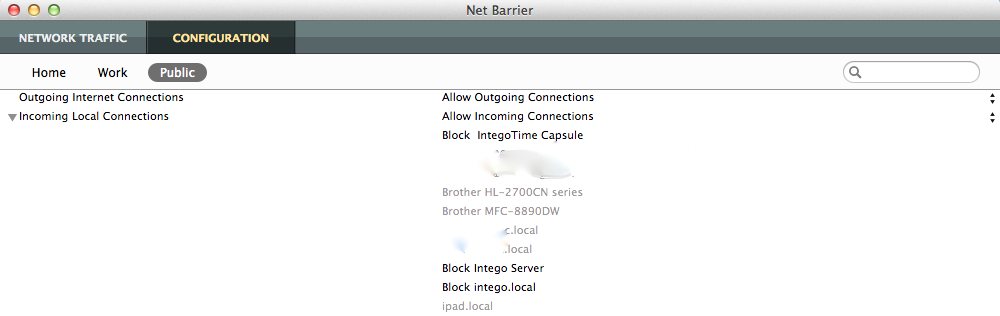
Expanding any of the applications allows you to modify “who” can talk to the application or to whom the application may talk.
You can find answers to other questions regarding NetBarrier in our Knowledge Base by clicking here.
Comments